Showing posts with label Josh's favorites. Show all posts

Parmesan Chicken Roll-ups

This is a new recipe to the Stephens house. And let me tell ya...it has quickly risen to the top 10 favorite list!


The first time I made this was a night that Josh and I were going to a friends house to play games. I didn't judge how much time we had to cook and eat before needing to leave. This meant we were eating in the car on our way to her house!
Josh took his first bite when we hit the first red light. He yelled so loud! It scared me at first! ...then I saw the look on his face and knew that he loved it!
Not only was it that yummy...but it was easy to eat in the car. Just in case that's something you look for in a meal ;)

 Remember HERE when I talked about cooking my chicken ahead of time? That comes in handy with  this meal and cut down a lot of the prep work, since you need to start with the chicken already cooked. (I used my pressure cooker to cook this chicken. It took 9 minutes to cook 3 frozen chicken breasts!!) Also, I never buy chicken tenderloins so I just use a thin cut chicken breast and slice that in half.

If you don't already have cooked chicken, that's fine! You can just start mixing your other ingredients together!
The first time I made this I used mayonnaise, sour cream, and cream cheese for the mixture. I didn't love the cream cheese taste with this too much so I've eliminated it since then. But if you like cream cheese...add it!

Spread this mixture across the entire crescent triangle then add some shredded mozzarella cheese to the wider end. I use shredded because that is just what I have. If you have it in a block or deli slices, that works too!


Add you chicken on top and roll it up! (Ignore my partially seasoned chicken... I don't know what happened there!)

Melt some butter (I did about 1-2 Tbsp) and add parsley and minced garlic. Spread this on top of the rolls for some extra flavor! The first time I made this I didn't add the garlic and it was still so good! ...but I love adding garlic to everything. I like it much more with some garlic!


Bake these for 14-15 minutes or until they turn golden-brown. My oven is exactly 14 minutes but I know every oven is a little different!


And these are pretty filling! I'm usually good with just eating 1 and Josh usually just eats 2 (sometimes 3 if he's super hungry)!
They do reheat pretty well. The roll just gets a little soggy if you do it in the microwave. But I recommend just eating all of them right out of the oven if you can!


Enjoy!

Mac n cheese!

Anybody who knows me well knows that I have a special place in my heart for Mac n cheese.
I'm pretty sure I can survive on the stuff! It has just always been a favorite of mine. Kraft, homemade, any kind and I would eat it.
I even use to have "Mac n cheese parties" with friends. I would make Mac n cheese and they would come over and play games. It was a great arrangement!

When I made homemade Mac n cheese it makes me feel a little better about this addiction of mine.

Anyways, I love this recipe. It is so yummy and its so easy!


The timing of everything is usually really perfect when I make this so I try to stick to my order.

Preheat your oven to 325.

I start with putting water on the stove and I add the noodles to it right away instead of waiting for it to boil or get hot. Then I just stir those occasionally while I make the sauce!

While the noodles are cooking I start right away with melting the butter. I try to get the flour and milk already measured out and sitting next to me so I don't have to worry about anything burning.

While I wait for that to boil, I measure out the cheese, salt, and get the garlic ready.

I also usually toast some bread to use for bread crumbs. If I do that, then I start the toast now so it can cool by the time I'm ready to add it on top of the noodles.

Once I add the cheese, salt, and garlic the noodles are usually about done cooking. I strain them and put them in a dish.

When the cheese is all melty in the sauce I add chopped bacon. Oh yeah, did I mention that I add bacon to this...because it's freaking amazing!)

Then just pour the sauce on top of the noodles and make sure it gets mixed around a bit so it gets over all of the noodles.

Add breadcrumbs, more cheese... anything you want on top of this.

The oven is usually preheated by now so I put it in the oven, set my timer and wait the long 20 minutes until I get to eat this!

Doesn't it look so good even before you bake it?!

This one received a 9/10 on the Josh scale and is still one of our favorites!


Enjoy:)


Crock Pot Chicken Cordon Bleu

I always really loved Chicken cordon bleu but whenever I would try to make it...it would just come out tasting dry!

My solution to that problem? Crock pot!! I haven't made anything in my crock pot that has come out tasting dry!


I know...that picture doesn't look THAT appetizing. Trust me, it's yummy!


This is also a pretty simple meal to make. There isn't too much prep involved!

First you want to get your chicken, ham and cheese ready! If you do cut it all the way through it will just be a little messier and your ham/cheese may fall out while it's cooking.

You can either use deli style slices of Swiss cheese or you can buy a block of it and slice it yourself. I like to cut mine off of a block because it's just easier to roll it up for me.


Once that's all rolled up it is time to stuff it in the chicken! You don't have to secure it with tooth picks but it just helps keep it together!


The sauce mixture is the easiest thing ever and it adds so much flavor to the chicken. Sometimes I add Dijon mustard to the mix to give it even more flavor! So keep that in mind!
 I just throw these both in a bowl and whisk it until there aren't too many clumps. 
You want to put half of this on the bottom on the crock pot, put the chicken in then pour the other half on top.


Last step is to add your stuffing mix on top of the chicken and top it off with the melted butter! 
And about the butter... if I'm being honest...I usually use more than just 1/4 cup. Butter is just really good.


Cook this on low for 4-6 hours and that's it! You are all done!

Enjoy!

PS. This is one that Josh gave a 9/10 on!

Taco Soup

Are you ready for one of the easiest dinners ever?!
This is one of my all time favorite freezer/crock pot meals! In fact...it was the first one I ever tried!

Josh also rated this a 9/10...so you know it's good!


There is absolutely no prep required before cooking. All you have to do is mix it all together. Easy enough?

If you're making this as a freezer meal just throw everything into a gallon size Ziploc bag. Be sure to label it with the name of the dish and the date you put it all together! (This should be good for about 3 months in the freezer)
I usually try to label my bags before I put anything in them...but about half the time I forget to...


This is anther recipe that doesn't have to be an exact science. You can add anything extra that sounds good or take out or reduce the amount of other ingredients.

When you are ready to cook, be sure that everything has thawed overnight.

Throw everything in the crock pot and sick back, relax for the next 4 hours!

Just before you serve, take the chicken out of the crock pot, shred it all, and mix it back in with the soup.

I like to add about 1/8 cup of Mexican blend cheese and 2-3 Tbsp of sour cream when I make this...it just gives it a little more flavor!


 And of course, eat with chips!
Guys...I'm not kidding, this is so easy to make and it is so yummy!!

It's also so cheap and easy to prep a ton at once. Just throw them all in your freezer for later!


Enjoy!!


Baked Potato Casserole with Chicken

Guys.
This was the first 10/10 Josh ever gave me!!

In fact...when we got home from our honeymoon this what the first thing he wanted me to make for him!


One of my favorite things about this recipe is that it is so versatile!

You like more chicken? Add more chicken.
You like more potatoes? Add more potatoes
You want to add some spice? Add some hot sauce or chili powder.
Basically anything you might normally add to a baked potato...add it!

You see what I mean? There are so many options!!

This one does take some effort though. You are are kind of prepping for a lot of the 45 minutes it takes to cook.


I always start by making the olive oil mixture with the salt, pepper, and garlic.
Sometimes when I make this I use minced garlic and other times I used garlic powder. I haven't noticed too much of a difference so I usually just go with whatever sounds fun at the time.


Right when I chop my potatoes I just throw them in this mixture and make sure they all get coated. 
I use my hands to fish them out of the mixing bowl so I don't bring too much of the oil with them. It can get a little too oily if you fish them out with a spoon.

Put the potatoes in an oiled baking dish (again...you don't need to oil the dish too much since the potatoes are coated in olive oil) and bake it for 30 minutes.

Make sure you take it out after 15 minutes just to stir in the dish!! That way they won't get baked onto the dish later.

Once the potatoes are in the oven I start to cut up the chicken into bite size pieces and put it all in the same olive oil mixture.
I just let it sit there in the refrigerator while the potatoes are baking.

After the chicken is taken care of... I start to chop my bacon and green onions.
(Also...see HERE why I bake my bacon ahead of time!)

When the potatoes are done with their 30 minutes its time to add everything else!! Woo!!

I first put the chicken then the bacon, green onions, and cheese. (I always do it in that order because I'm weird and feel like it matters... it doesn't!)

Bake this all for another 15 minutes and it comes out looking like this:


Oh yeah...and remember that you can always add as much cheese and bacon as you want. The more the merrier!

Josh loves to put sour cream on this to make it even more baked-potato-like. He loves the stuff!


Enjoy!

BBQ Sweet and Sour Meatballs

This is one of my favorite freezer meals I have done so far!
Josh gave this one a 9/10!! Those are not too common!

One of the reasons I love freezer meals is that there is minimal prep required!

And it's even better if it is something I can just throw in the crock pot!
(Or have Josh start in the crock pot...)

This recipe says to cut up a pineapple but If I'm being honest I totally just bought canned pineapple chucks.
Of course it would taste better with fresh pineapple, but just know that it is not a must!


Another bonus...this one makes for great left overs!!


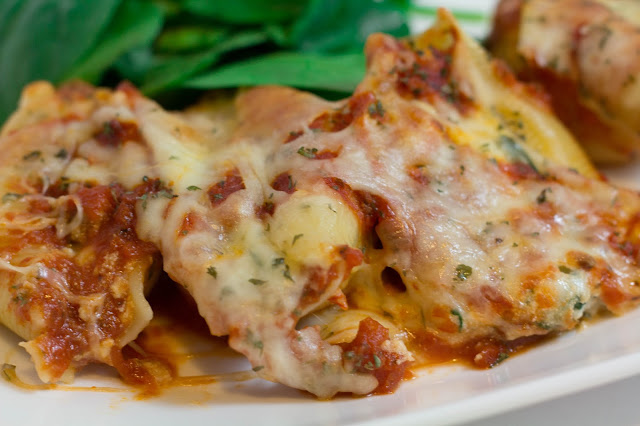
Stuffed Shells with Italian Sausage

This dish was one of the first 10/10 that I got from Josh!

in fact, if I remember correctly he took 1 but and just started screaming! At first I thought he was just yelling because it was burning his tongue or something... I'm glad I was wrong!

This is a relatively simple dish to make but you do have to get your hands dirty (I found it's just easiest that way...)


Start by just cooking your shells. I like to cook them slightly al dente so they don't get too soft when you bake everything later.

While the shells are on the stove I made the cheese mixture! This time I added some steamed spinach and it made for such a tasty addition! (Josh and I have a hard time with veggies so I have been trying to sneak them into our meals. Shh!)


Once you've mixed it all together and added the sausage to the mix it should look something like this:


Once the shells are cooked be sure to let them cool down before adding the mixture to them! I have burned my hands before when I get too lazy to let them sit for a couple minutes. Learn from my mistakes!!

Add a small layer of sauce to the bottom of your baking dish. I usually do just over 1/4 cup for this.

Now for the fun part...
I found that the easiest way to stuff the shells is to just use my hands. It gets a little messy but it gets the job done!


When you shells are all stuffed and in the pan add more sauce and more cheese! (You can never have too much cheese!!)

I added some parsley flakes to the top of mine to make it pretty...cause I like that kind of stuff. 

Bake this for about 25 min or until the cheese is nice and bubbly on top. I like the cheese to get a little crispy so sometimes I let mind cook for a little longer...but that's just me.


And there ya go! a 10/10 meal on the Josh Stephens scale!

This is definitely one of our favorites and it makes for good left overs too!!